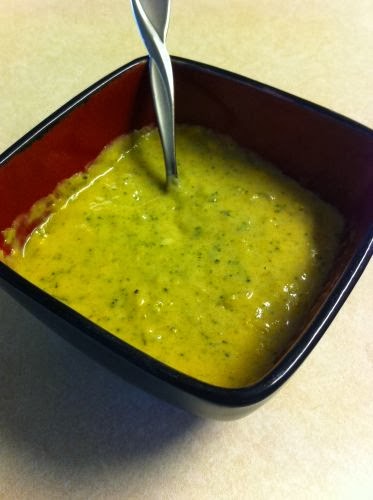
I made this a few days ago and I have more cooking in the crock pot as I type this blog entry. It's cold and snowy outside today, so this is the perfect dish for dinner. Super easy to make, super yummy and who doesn't love a good crock pot recipe?
Ingredients Needed:
2 Cans of Mild Diced Tomatoes & Chilies (do NOT drain your juice)
1 Yellow Onion - Chopped (I did big chunks)
2 Boneless Skinless Chicken Breast (I used frozen)
McCormick Mesquite Seasoning
Less Sodium Soy Sauce (amount used is based on preference, I used about 1 tablespoon)
1 Tablespoon Earth Balance Butter
1 12 oz bag of Broccoli Slaw
Ready?
Chop your onion, I did big chunks. Pour 2 cans of tomatoes & chilies (juice included) in crock pot, top with your chopped onion. Place frozen boneless skinless chicken breast on top. I did not use a specific amount of mesquite seasoning, just enough to cover my chicken. The juice from the tomatoes and chilies makes this :almost: soup like. Not quite a soup, but juicy. Ah yummy. (although I'm sure you could add a can of broth to make this soup)
Cook on high for 4 hours, stir occasionally. After 3 hours I used two forks to start shredding my chicken. Once shredded, add your bag of broccoli slaw, tablespoon of butter and tablespoon of soy sauce. Let cook for remaining hour.
Done. I think this would also taste really good with maybe some corn and black beans added to it. So delish! I hope you enjoy as much as I did! :)
Tuesday, January 28, 2014
Saturday, January 25, 2014
Crock Pot Apples
OKAY.....I WILL be making this again. Soon. Very soon.
What I love about this recipe is that you can puree it and make applesauce OR it would make the BEST apple pie filling. This recipe is super easy and it makes your house smell like yummy apples.....who doesn't love that?
Ingredients:
10 Apples - I purchased a bag of Fuji Apples
1/2 Cup of Earth Balance Butter - melted.
1/2 Teaspoon of Cinnamon (or more if you like)
1/2 Teaspoon of Pumpkin Pie Spice (just for a little extra something tasty)
1/4 Cup of Brown Coconut Sugar
1/4 Cup of Honey
Having an Apple Corer/Slicer makes the apple cutting process SO much easier, trust me. You can pick one up at Walmart.
See how easy that is? And then use your knife to peel your apple skin. *You could probably leave the skin on if you wanted to.
Ready?
Once you have all your apples cored/sliced/peeled place them in the crock pot.
In a small bowl, mix your brown coconut sugar, cinnamon and pumpkin pie spice.
Sprinkle the mixture over apples. Top with your honey and melted butter. Mix to make sure all apple slices are coated.
Cook on high for about 2 hours. Stir occasionally to make sure apples are evenly coated.
This isn't a necessary step, but I took this cute little egg guy and mashed my apples (some).
Like I said, this would make the BEST apple pie filling, applesauce or even served with oatmeal. I foresee myself making an apple pie in the very near future. This tasted super yummy served over some of my Gluten/Dairy Free Granola.
Hope you enjoy as much as I did!! :)
What I love about this recipe is that you can puree it and make applesauce OR it would make the BEST apple pie filling. This recipe is super easy and it makes your house smell like yummy apples.....who doesn't love that?
Ingredients:
10 Apples - I purchased a bag of Fuji Apples
1/2 Cup of Earth Balance Butter - melted.
1/2 Teaspoon of Cinnamon (or more if you like)
1/2 Teaspoon of Pumpkin Pie Spice (just for a little extra something tasty)
1/4 Cup of Brown Coconut Sugar
1/4 Cup of Honey
Having an Apple Corer/Slicer makes the apple cutting process SO much easier, trust me. You can pick one up at Walmart.
See how easy that is? And then use your knife to peel your apple skin. *You could probably leave the skin on if you wanted to.
Ready?
Once you have all your apples cored/sliced/peeled place them in the crock pot.
In a small bowl, mix your brown coconut sugar, cinnamon and pumpkin pie spice.
Sprinkle the mixture over apples. Top with your honey and melted butter. Mix to make sure all apple slices are coated.
Cook on high for about 2 hours. Stir occasionally to make sure apples are evenly coated.
This isn't a necessary step, but I took this cute little egg guy and mashed my apples (some).
Like I said, this would make the BEST apple pie filling, applesauce or even served with oatmeal. I foresee myself making an apple pie in the very near future. This tasted super yummy served over some of my Gluten/Dairy Free Granola.
Hope you enjoy as much as I did!! :)
Sunday, January 19, 2014
Garlic Mashed Cauliflower
Are you a lover of mashed potatoes like me? Do you want a healthier and just as tasty alternative? Then you'll LOVE this new recipe! This is super easy to make and so yummy!
Ingredients Needed:
1 Head of Cauliflower - break down to bite size pieces, check out this helpful tutorial if you haven't worked with cauliflower before.
1 bulb of Garlic - peeled
2 Tablespoons of Earth Balance Butter
1/2 Teaspoon of Salt
Ready to Cook?
Once you have your cauliflower broke down and garlic peeled, place in steamer basket over boiling water, cover and steam until very tender, 12 to 15 minutes.
After it's cooked, place in food processor. I used my Ninja Kitchen System Pulse. Add your butter and salt. Blend until smooth and creamy. Transfer to serving bowl.
Serve hot.
I had chicken and corn with my garlic mashed cauliflower, topped with a bit of pepper! Yummy!
Hope you enjoy as much as I did! :)
Ingredients Needed:
1 Head of Cauliflower - break down to bite size pieces, check out this helpful tutorial if you haven't worked with cauliflower before.
1 bulb of Garlic - peeled
2 Tablespoons of Earth Balance Butter
1/2 Teaspoon of Salt
Ready to Cook?
Once you have your cauliflower broke down and garlic peeled, place in steamer basket over boiling water, cover and steam until very tender, 12 to 15 minutes.
After it's cooked, place in food processor. I used my Ninja Kitchen System Pulse. Add your butter and salt. Blend until smooth and creamy. Transfer to serving bowl.
Serve hot.
I had chicken and corn with my garlic mashed cauliflower, topped with a bit of pepper! Yummy!
Hope you enjoy as much as I did! :)
Healthy Pineapple Sorbet
Healthy. Easy to make. 3 Ingredients. YUMMY. That's how I would describe my Pineapple Sorbet. Oh and it was a HUGE hit with my son. He has Autism and when it comes to food, he's super picky due to sensory/textures. He LOVED it. LOVED. ::that's a big deal you guys:: He inhaled almost 3 bowls, I had 1 1/2 and we had none left.
Ingredients Needed:
![]() |
| Needless to say, he was excited to help me make this recipe! :) |
1 Fresh Pineapple - peeled, cored and chopped.
(here's a great tutorial to show to work with Pineapple if you are unfamiliar, like I was!)
1 Cup of Soy Milk
1 tablespoon of honey - optional, but does add some sweetness.
Who wants Sorbet?
So I peeled, cored and chopped my pineapple and froze the pineapple chunks overnight. You can use frozen pineapple if you prefer.
Combine the frozen pineapple, milk and honey. Blend until it's a sorbet texture. I use a Ninja Kitchen System Pulse. I :almost: needed something a little bit bigger, but I made it work!
Serve immediately.
IF you have any left over you can freeze in ice cube trays and you can use later for smoothies! :)
Next time, I'll make a double batch, because it was gone within 20 minutes. Yummy.
![]() |
| Yes, he's wearing a Christmas shirt in January. It's cute and he loves it! :) |
Friday, January 17, 2014
Healthy Spicy Chicken Stir-Fry
I've done it again. I came up with a new recipe and I LOVE it! Hope you do too! It's super easy to make and very yummy!
Ingredients Needed:
Boneless Skinless Chicken Breast - thawed, if using frozen (I used about a pound)
1 12 oz Bag of Broccoli Slaw
1 Package of Sliced Mushrooms (forgot to take a picture, but any kind of mushrooms will work)
2 Yellow Onions - Chopped
1 Clove of Garlic - Minced
Less Sodium Soy Sauce (amount used is based on preference. I used about a tablespoon)
McCormick Mesquite Seasoning (optional if you want spicy stir-fry)
1 Tablespoon of Earth Balance Butter (or whatever butter you would like)
Ready to Cook?
Cut your chicken into bite size pieces and cook on medium heat. While your chicken is cooking, chop your onion and mince your garlic. Here is a helpful tutorial on how to peel garlic, if you aren't sure how. Once your chicken is done cooking, set it aside. Now you are going to saute your mushrooms, onion, garlic and broccoli slaw with your 1 tablespoon of Earth Balance Butter (or whatever butter you use). After about 3 minutes add your soy sauce and mix. Then you are going to add your chicken and McCormick Mesquite Seasoning. I used about a half of package, it really depends on how spicy you would like it! Mix well and let it cook for about 3-5 minutes.
You're ready to eat!
Yummy Yummy!! This is really good with grape tomatoes on the side!
Hope you enjoy as much as I did! :)
Wednesday, October 23, 2013
Spicy Broccoli and Cheese Soup
It's starting to get cold out and that's my favorite time of the year. I love fall. I love the cold. And I love being able to make my broccoli and cheese soup.
This is super easy to make and super yummy to eat!
Ingredients Needed:
1 Chopped Yellow Onion
1 Clove of Garlic - Minced
1 Tablespoon of Earth Balance Butter (or whatever butter you would like)
3 Cups of Fat Free, Less Sodium Chicken Broth
1 (16 ounce) Bag of Broccoli Florets
2 1/2 Cups of Milk - I use Soy Milk
1/3 Cup All Purpose Flour
1/4 teaspoon Black Pepper
8 ounces 2% Milk Velveeta Cheese, cubed.
McCormicks Mesquite Seasoning (optional)
Ready to Cook?
Chop your yellow onion and mince your garlic. Heat a large sauce pan on medium-high heat. Add one tablespoon butter in sauce pan with onions and garlic. Saute for about 3 mins or until tender. Stir frequently to prevent sticking. After that, add chicken broth and broccoli, bring to a boil. Reduce to medium heat and cook for 10 mins.
Mix flour and milk in bowl, stirring until well blended. Once your broccoli has finished cooking for the 10 mins., add your milk/flour mixture and cook for another 5 mins or until slightly thick. Stir constantly or it will stick. Stir in your pepper. Add your cubed cheese and stir until melted. If you are using the McCormicks Mesquite Seasoning, add 1/2 - 1 package of seasoning, just depends on how spicy you want it. *This is optional, if you want your soup spicy.
Place one-third of the soup in a blender or food processor, and blend until smooth. Return pureed soup mixture to pan and stir together.
Allow to cool and then you are ready to eat. I hope you enjoy this lovely, yummy fall dish.
This is super easy to make and super yummy to eat!
Ingredients Needed:
1 Chopped Yellow Onion
1 Clove of Garlic - Minced
1 Tablespoon of Earth Balance Butter (or whatever butter you would like)
3 Cups of Fat Free, Less Sodium Chicken Broth
1 (16 ounce) Bag of Broccoli Florets
2 1/2 Cups of Milk - I use Soy Milk
1/3 Cup All Purpose Flour
1/4 teaspoon Black Pepper
8 ounces 2% Milk Velveeta Cheese, cubed.
McCormicks Mesquite Seasoning (optional)
Ready to Cook?
Chop your yellow onion and mince your garlic. Heat a large sauce pan on medium-high heat. Add one tablespoon butter in sauce pan with onions and garlic. Saute for about 3 mins or until tender. Stir frequently to prevent sticking. After that, add chicken broth and broccoli, bring to a boil. Reduce to medium heat and cook for 10 mins.
Mix flour and milk in bowl, stirring until well blended. Once your broccoli has finished cooking for the 10 mins., add your milk/flour mixture and cook for another 5 mins or until slightly thick. Stir constantly or it will stick. Stir in your pepper. Add your cubed cheese and stir until melted. If you are using the McCormicks Mesquite Seasoning, add 1/2 - 1 package of seasoning, just depends on how spicy you want it. *This is optional, if you want your soup spicy.
Place one-third of the soup in a blender or food processor, and blend until smooth. Return pureed soup mixture to pan and stir together.
Allow to cool and then you are ready to eat. I hope you enjoy this lovely, yummy fall dish.
Tuesday, October 22, 2013
Fall Wreath Y'all
Materials Needed:
12" Styrofoam Extruded Wreath - bought at Hobby Lobby
Wooden Initial - We did D for our last name.
Yarn - whatever color you like, we did green.
Buttons & Flowers - optional
I luckily went on the right day and got the orange burlap and the chevron burlap for 40% off. The tulle I already had at home, so that worked out perfectly.
Let Us Assemble:
I used some crafting wire to securely attach the styrofoam to the metal wreath.
I wrapped the green tulle around the first metal ring all the way around the metal wreath. I wrapped the orange burlap in between the first and second ring covering all of the styrofoam.
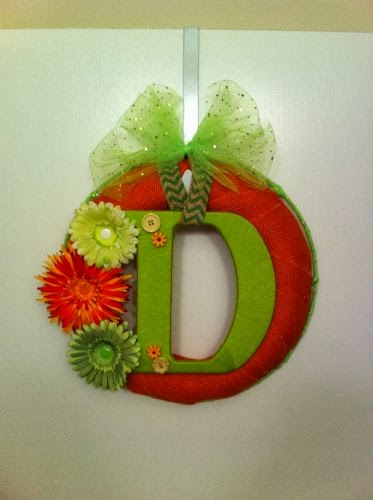
This was my finished product. And it just looked like it was missing something. SO, I went back to Hobby Lobby and picked up the initial D and some green yarn. I wrapped my D with the yarn, the corners at the top and bottom were a little tricky. It was left bare, so that's when I decided to add the buttons. It covered the spots that were missing yarn and added a little something extra. Luckily, I already had the buttons on hand. *confession: I am a hoarder of craft supplies.
I used the chevron burlap ribbon to hang my D. It was being a little tricky since it's wide ribbon, it was going to show one side chevron, one side brown. I couldn't have that, so I folded it in half and hot glued it together to keep it from coming undone. So I hung the D. Still, it seemed like it was missing something. So, I went back to my craft supplies and pulled out the flowers. I actually had made these into flower hair bows, but repurposed them for my new wreath! See, there are some perks to being a craft supply hoarder. Haha.
I just decided on the order I wanted to place my flowers and then hot glued them down. Eeek, how cute does that look?
So there you have it, my finished wreath. Such a fun craft to do and I now have the perfect fall wreath to hang every year.
Hope this gets your creative juices flowing and inspires you to create something special to hang on your door! :)
Labels:
burlap,
buttons,
chevron,
crafting,
decor,
dyi,
dyi wreath,
fall,
fall decor,
fall wreath,
flowers,
green,
metal frame,
orange,
styrofoam,
tulle,
wooden initial,
wreath,
yarn
Subscribe to:
Posts (Atom)