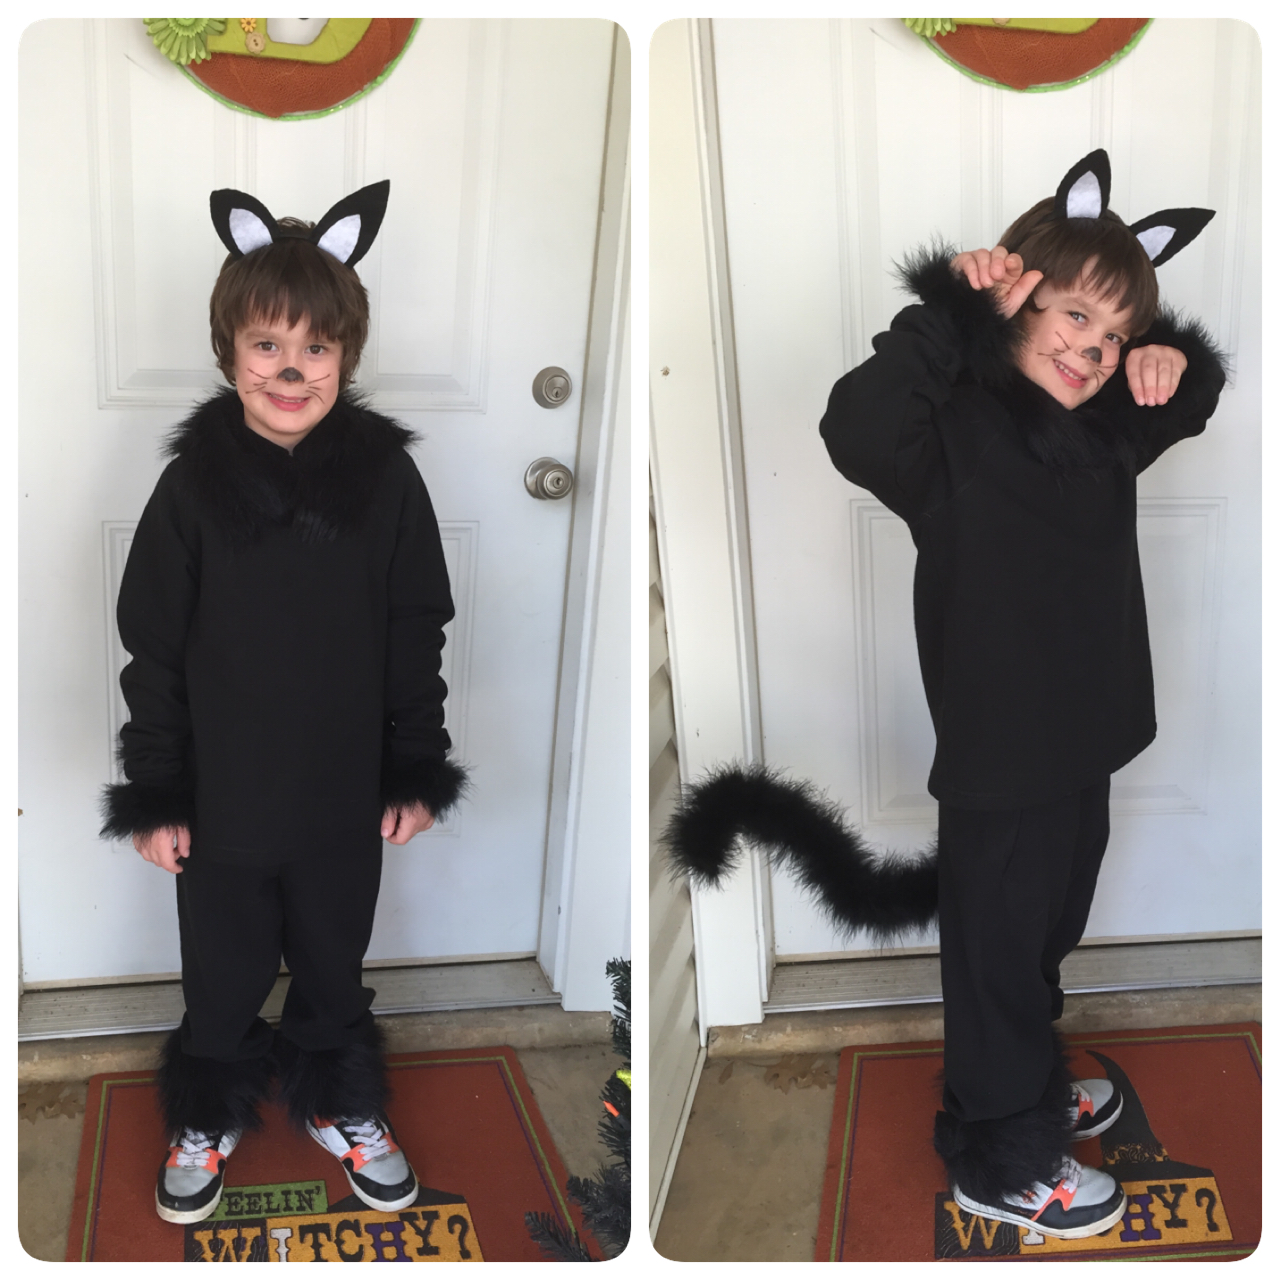
Okay, so who doesn't LOVE Hocus Pocus? I know we do! So this Halloween Ronnie wants to be Binx from Hocus Pocus. If you haven't seen that movie....Binx is a boy who was turned into a black cat. And if you haven't seen that movie, you MUST. Yeah, I could have go to the Halloween store and bought the ears, tail and even cat paws....but I just love doing homemade when I can. It's fun and I think it makes it extra special.
So I gathered up my supplies from Hobby Lobby. I found the black sweatshirt/sweatpants at Walmart and picked up some wire hangers. I already had the headband from other craft projects, but it did come from Hobby Lobby.
So from Hobby Lobby I bought 2 sheets of black felt and 2 sheets of white glitter felt (for the inside of the ears). I also bought some black elastic and velcro to make the belt that will hold the tail. We picked up some fluffy boa wearable art, which was perfect for his wrists.
Also, some black fur that I used to make a collar piece and fur to go around his ankles. They had a large piece of black boa type material that I used to wrap around the wire hanger that made his tail.
For his tail: I bent/twisted the hanger until I got it how I wanted. I slowly but surely hot glued the feather boa material from top to bottom, until it was completely covered. I did leave a small piece of the wire hanger not covered. This part is bent to hook over the elastic belt.
For the elastic band that his tail clips on. I measured out how much I needed and then added velcro on each end. I bought velcro that had adhesive on it already, but ended up (hand) sewing it because it kept trying to come off. I ended up sewing ALL velcro pieces because of this reason.
Now for the ears:
I grabbed a sheet of computer paper and hand drew the cat ears, the black piece bigger than the white. Ronnie helped me pick how big they should be. He chose white for the inner ear "because the inside of a cats ear is white." It's easier to just fold your piece of felt and pin your paper design to it, cut around it. This cuts both ears at once and I did the same with the white felt. I hand stitched the white felt onto the black and then sewed the black ends together. Now, where my finger is pointing in the last ear picture, I put hot glue all along that area and wrapped it over the headband, just to offer some extra support. And then I sewed the ears on the headband.
For the fur collar:
I bought 2 packages of this. My first piece, I cut it half and sewed the ends together to make the fur collar. Also, sewed the velcro pieces on to help keep it in place. I took the other black fur and cut it in half. I put velcro on each end so it can connect and that makes the fur that goes around his ankles.
I used black eyeliner for his face makeup. How adorable is he though? :)
I personally think he makes the most adorable Binx EVER....and NO! I did not make him do this, that's all Ronnie.....
He makes my heart melt. He's so cute!
Anywho,
Hope you enjoyed this tutorial and maybe it will give you an idea for a super easy and cute costume to make for your little one!
CHECK OUT this SUPER FUN Halloween Craft: http://healthymommatalk.blogspot.com/2013/10/outdoor-halloween-decor.html
And THIS ONE: http://healthymommatalk.blogspot.com/2013/10/outdoor-halloween-ghost-decoration.html


I must say, I thought this was a pretty interesting read when it comes to this topic. Liked the material. . . cat
ReplyDeleteThanks David! :)
Delete